JAVA CRUD Operations with MySQL for beginners
For beginners, this article will help to take an idea about some basic CRUD operations using Java and MySQL.

Before we start, you need to have some requirements with you. Make sure you have all these things.
- Netbeans IDE (I prefer Netbeans because I’m using Netbeans in this tutorial)
- JDBC connector.
- Java 8.0 or upper version installed.
- XAMPP installed.
Alright, let’s start our tutorial. I’m going to show these java CRUD operations by creating a basic course management system.
Creating the UI using a java swing package
let’s start creating the UI first. If you are using the Netbeans IDE just create an empty JFrame.
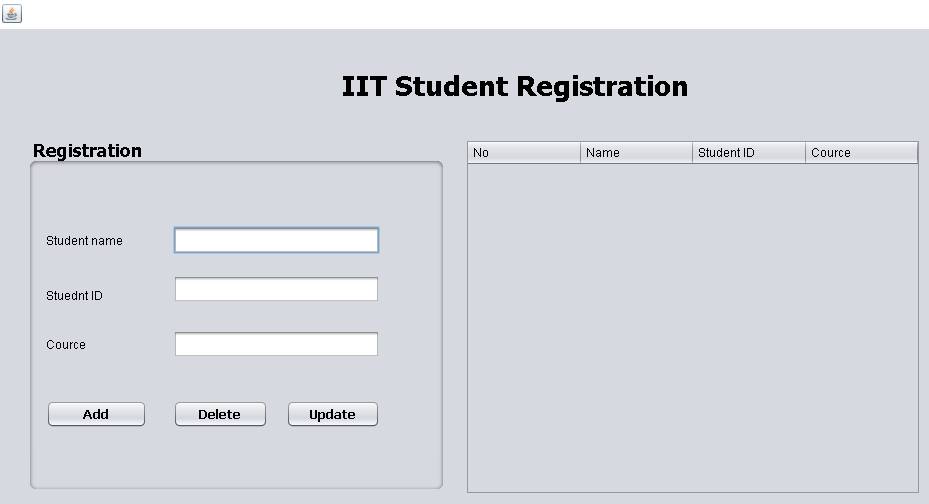
This is the UI you have to create, you can find the code for UI in my Github repo. You can easily drag and drop the UI elements from Netbeans IDE.
Creating the MySQL Database
In order to store the data from the system, you need to have a database. Using XAMPP you can easily create your database. In this example, my database name is iit, and the table name is record.
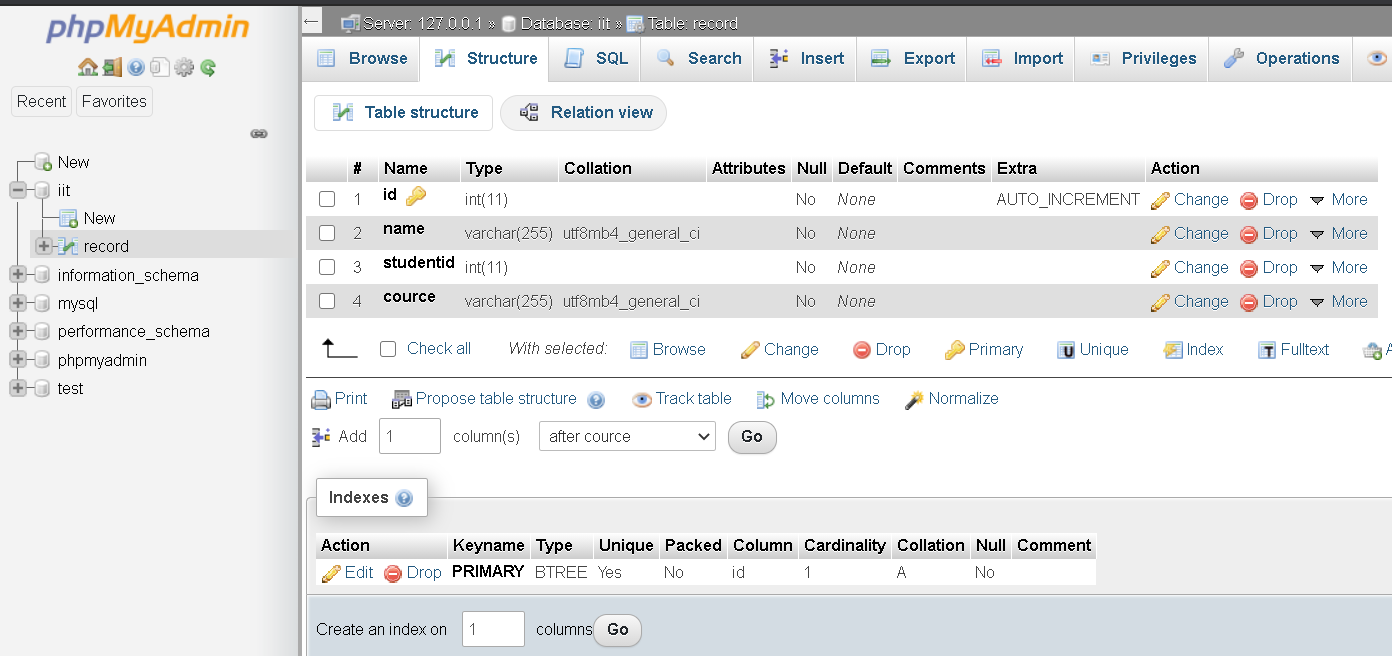
You can see my database structure and you need to follow the exact same way. Once you created the database you can perform the CRUD operations with the system.
Getting started with CRUD Operations
CRUD stands for Create, Read, Update, and Delete. Let’s discuss one by one for a better understanding.
Setting up the JDBC Library
In order to work with the java with MySQL
CREATE
What CREATE operation showed in this example is that storing the data which is given to the student registration form (check UI). When you click the Add button those data will be saved to the database. In this scenario Student name, Student ID, and Course name will be saved into the database. Below I have mentioned the code sample for the CREATE operation.
private void jButton1ActionPerformed(java.awt.event.ActionEvent evt) {
  String name =txtname.getText();
  String studentId =txtid.getText();
  String cource =txtcource.getText();
        try {
            Class.forName("com.mysql.jdbc.Driver");
            con1 = DriverManager.getConnection("jdbc:mysql://localhost/iit","root","");
            insert = con1.prepareStatement("insert into record(name,studentid,cource)values(?,?,?)");
            insert.setString(1, name);
            insert.setString(2, studentId);
            insert.setString(3, cource);
            insert.executeUpdate();

            JOptionPane.showMessageDialog(this,"Record Saved");

            txtname.setText("");
            txtid.setText("");
            txtcource.setText("");
            txtname.requestFocus();
            table_update();

        } catch (ClassNotFoundException ex) {
            Logger.getLogger(reg.class.getName()).log(Level.SEVERE, null, ex);
        } catch (SQLException ex) {
            Logger.getLogger(reg.class.getName()).log(Level.SEVERE, null, ex);
        }}
READ
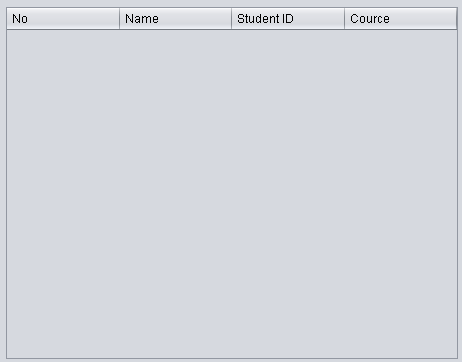
Once you perform the CREATE operation you can read back the data you created. In this example, I’m reading back the data from the database and show it using a table. for the table, you have to create the table in the following manner.
Now follow this code to add your READ operation.
private void table_update() {
        int CC;
        try {
            Class.forName("com.mysql.jdbc.Driver");
            con1 = DriverManager.getConnection("jdbc:mysql://localhost/iit","root","");
            insert = con1.prepareStatement("SELECT * FROM record");
            ResultSet Rs = insert.executeQuery();

            ResultSetMetaData RSMD = Rs.getMetaData();
            CC = RSMD.getColumnCount();
            DefaultTableModel DFT = (DefaultTableModel) jTable3.getModel();
            DFT.setRowCount(0);while (Rs.next()) {
                Vector v2 = new Vector();

                for (int ii = 1; ii <= CC; ii++) {
                    v2.add(Rs.getString("id"));
                    v2.add(Rs.getString("name"));
                    v2.add(Rs.getString("studentid"));
                    v2.add(Rs.getString("cource"));
                }
                DFT.addRow(v2);
            }
        } catch (Exception e) {
        }
    }

Now you can see that the records we entered successfully retrieved back and showed by READ operation.
UPDATE
Once you enter the record you may need to edit it. Using the UPDATE function you can edit the records in your database. Add the following code to the update button to perform the UPDATE function.
private void jButton3ActionPerformed(java.awt.event.ActionEvent evt) {
        // TODO add your handling code here:

            //update function
            DefaultTableModel model = (DefaultTableModel) jTable3.getModel();
            int selectedIndex = jTable3.getSelectedRow();
            try {

            int id = Integer.parseInt(model.getValueAt(selectedIndex, 0).toString());
            String name =txtname.getText();
            String studentId =txtid.getText();
            String cource =txtcource.getText();

            Class.forName("com.mysql.jdbc.Driver");
            con1 = DriverManager.getConnection("jdbc:mysql://localhost/iit","root","");
            insert = con1.prepareStatement("update record set name= ?,studentid= ?,cource= ? where id= ?");
            insert.setString(1,name);
            insert.setString(2,studentId);
            insert.setString(3,cource);
            insert.setInt(4,id);
            insert.executeUpdate();
            JOptionPane.showMessageDialog(this, "Record Updated");
            txtname.setText("");
            txtid.setText("");
            txtcource.setText("");
            table_update();


        } catch (ClassNotFoundException ex) {

        } catch (SQLException ex) {}
    }
DELETE
At last, this is how you delete the records in your database. You can remove the records by selecting them from the table and using the delete button. Add this code to the delete button in your UI.
private void jButton2ActionPerformed(java.awt.event.ActionEvent evt) {
        // TODO add your handling code here:


          // Delete function
          DefaultTableModel model = (DefaultTableModel) jTable3.getModel();
          int selectedIndex = jTable3.getSelectedRow();
            try {

            int id = Integer.parseInt(model.getValueAt(selectedIndex, 0).toString());
            int dialogResult = JOptionPane.showConfirmDialog (null, "Do you want to Delete the record","Warning",JOptionPane.YES_NO_OPTION);
            if(dialogResult == JOptionPane.YES_OPTION){Class.forName("com.mysql.jdbc.Driver");
            con1 = DriverManager.getConnection("jdbc:mysql://localhost/iit","root","");
            insert = con1.prepareStatement("delete from record where id = ?");

            insert.setInt(1,id);
            insert.executeUpdate();
            JOptionPane.showMessageDialog(this, "Record Delete");
            txtname.setText("");
            txtid.setText("");
            txtcource.setText("");
            table_update();
           }
        } catch (ClassNotFoundException ex) {
        } catch (SQLException ex) {
        }
    }
Now you can see that we have completed the basic four functions that you must know if you are learning JAVA. If there are any issues with this example you can check the git repo and take the full source code from there.